Learning how to make skeleton drawings is not only useful to surprise your relatives with your artistic skills on Halloween.
As we mentioned in our Online Painting Course – Initiation + Advanced, knowing the human, animal or floral anatomy is essential to achieve realism in your works.
Representation of the human figure
As we mentioned, to reach a level of expressiveness in which we can demonstrate our knowledge and communicate what you want with your work, the first thing you must do is to know the human anatomy.
To study the anatomy of the human body, you should focus on the bony structure (the bones, the skeleton) and the muscular structure. We do not suggest that you study it in extreme detail or that you know all the names of the bones or muscles, but it is important that you know the most important ones.
Representing the human figure requires a lot of practice and in-depth study. On this occasion, we will try to tell you in a simple way how to make skeleton drawings which, after all, is the basis of everything and will always be the same in all humans (aSome are larger, some are smaller, but the structure is always the same).
How to make skeleton drawings step by step?
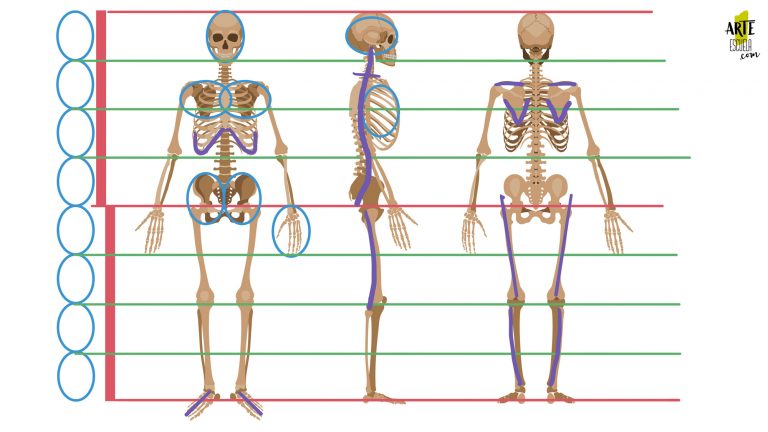
As always when starting to draw, the first step will be to deconstruct into basic shapes. We will teach you how to achieve realistic skeleton drawings and we will also give you some guidelines so you can calculate the proportions.
To perform this practice you only need a sheet of paper, preferably white, and a pencil.
Drawing the skull of the skeleton
Starting from the top down, to draw the skull, you can divide it into two basic shapes: a circle for the hard bone area and an oval shape for the mobile part(the jaw). Or you can simply make an oval.
Keep in mind that if you draw the skeleton from the side, you should draw the skull more forward than the rest of the skeleton. Remember that the neck and spine will have curvatures.
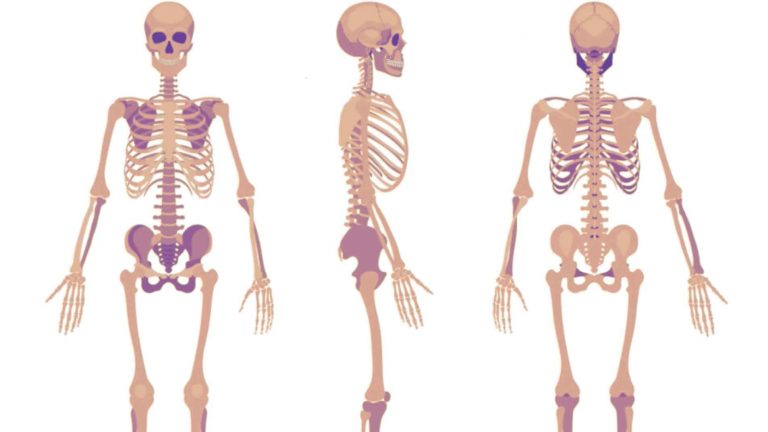
The eyes are two hollow ovals and the nose you can draw by making an upside down heart.


Draw the spine and neck of the skeleton.
The neck and spine, if drawn from the front or back, will be a straight line. But, as we mentioned before, if it is drawn from the side, the neck will be a perpendicular line and the spine will have curvatures (a kind of S).
The clavicles are drawn with basically horizontal lines. These join the shoulders to the sternum (the area in the middle of the ribs).
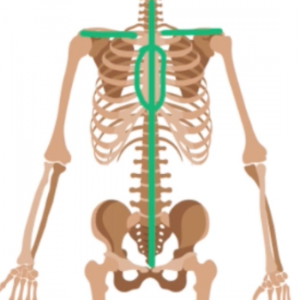
The shape of the rib cage is quite distinctive, you could draw it as a kind of upside down heart, if you draw the skeleton from the front or from the back. If you draw it from the side, represent it with an oval.
When drawing the ribs, remember that they start out narrower, until you get to the last ones (the floating ones).

Draw the arms and hands of the skeleton.
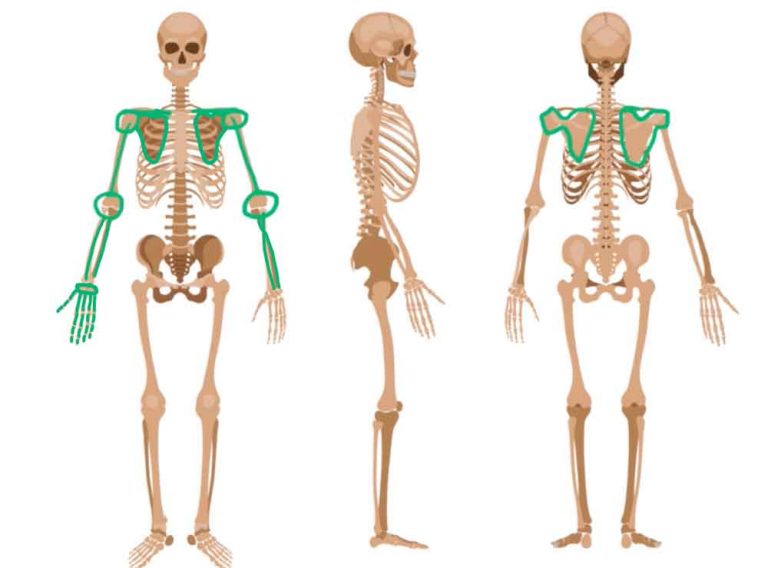
At the ends of the clavicles, draw two circles that will be the head of the humeri (the bone between the clavicle and the elbows).
It continues with the shoulder blades (back bones) that will come from the head of the humeri. Finally, draw a circle representing the junction between the humerus and the bones of the forearm (the elbow).
For the forearm, you have to make two lines. If you draw the arms with the palm facing forward (i.e., thumb outward) they will be two curved lines. But if you draw it with your thumb inward, the lines cross at the top.
To draw the hands, make an oval, which will be the base of the wrist and from this will come out 5 lines, (the phalanges) draw the lines and divide them into 3 zones.
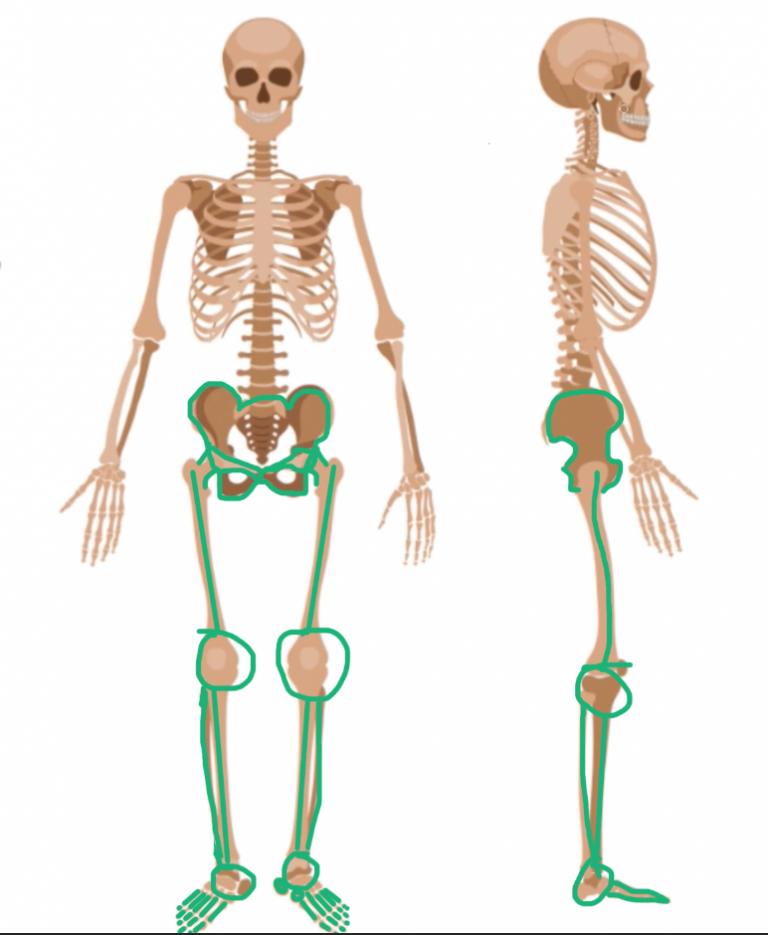
Draw the hips and legs of the skeleton.
As you can see, the hips are formed by two bones that are wider at the beginning and join the femur and then become narrower. The lower part may resemble a mask and the overall area may resemble the shape of a butterfly.
As for the legs, it is important to note that the femur is not straight, it tends to tuck in, so the knees are closer together than the hip joint areas.
And finally, draw the tibia and fibula, which, like the forearm, is composed of two bones; with the difference that the tibia is wider and they do not cross.
In the feet the same happens as in the hands, the phalanges reach the ankle joints, dividing each phalanx into 3 zones.
Proportions in drawings of adult skeletons
On average, the human skeleton is equivalent to eight heads. The hips, shoulders and collarbone are equivalent to two heads and the hands to one.
All this and much more we will teach you step by step in our Online Drawing Course
We hope these guides will help you to make your skeleton drawings. We can only tell you, let’s get to work!
