Pastel painting is one of the most versatile and expressive artistic techniques.
In this article, we will explore the basics of pastel painting, from the choice of materials to the essential techniques for mastering this art.
Introduction to Pastel Painting
Pastels, known for their vibrant range of colors and textures, offer a unique experience for artists.
Unlike other mediums such as oil or watercolor, pastel combines the qualities of drawing and painting in a compact and accessible form.
But what makes pastel so special?
What are Pasteles?
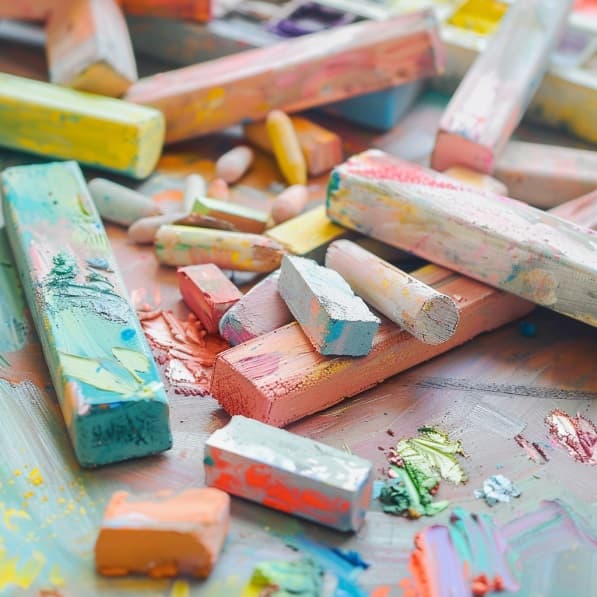
Pastels are sticks of dry pigment that are mixed with a binder to hold their shape.
There are three main types of pastels:
- Dry Pastels: Include soft and hard pastels.
They are ideal for a wide range of techniques due to their ability to blend and blend easily. - Oil Pastels: Contain oils that give them a creamy texture.
They are perfect for thicker and layered effects. - Pastels in Bars: Combine characteristics of dry pastels and oil pastels, offering a balance between fluidity and texture.
Basic Principles of Pastel Painting
The first step in painting with pastels is to understand how the different types of pastels work and how they can be applied to various surfaces.
Materials Needed and Choice of Cakes
- Soft Pastels: They offer a wide variety of vibrant colors and are easy to blend.
However, their soft texture can be a challenge for beginners. - Hard Pastels: They are ideal for details and fine lines due to their firmer consistency.
- Oil Pastels: Provide a more robust finish and are excellent for layering and texturing.
Papers and Supports
The choice of paper is crucial to the success of a pastel painting.
Textured papers allow for better pigment adhesion.
Some of the most recommended include:
- Canson Mi-Teintes paper: Popular for its texture and variety of colors.
- Sand Paper: Offers a rougher texture, ideal for retaining several layers of cake.
- Pastelmat paper: Combines smoothness and texture, providing a unique surface to work on.
Other Materials
- Fixative: Used to fix the pastel and prevent stains.
- Diffusers or Tortillones: Tools for blurring and mixing colors.
- Gloves and Mask: To protect from cake dust.
Pastel Painting Techniques
Once you have your materials, it’s time to explore basic pastel painting techniques.
- Blurring Technique: Blurring is essential for creating smooth transitions and gradient effects.
You can blend with your fingers, a soft cloth, or a blender.
The key is to apply the pastel in light layers and blend to the desired softness. - Layering: The layering technique allows for depth and texture.
Start with lighter colors and work toward darker colors, applying each layer gently to avoid saturating the paper. - Texture Effects: To create texture, you can use techniques such as scratching or rubbing.
Scratching involves scraping off the top layer of pastel to reveal the color underneath.
Rubbing uses tools such as stiff brushes or spatulas to create patterns on the surface. - Color Blending: Color blending in pastels can be achieved in several ways.
One of the most common is to overlap layers of different colors and blend them.
You can also mix directly on the palette before applying to the paper.
Care and Conservation
Caring for your paints and materials is crucial to maintain their quality over time.
- Fixing the Work: Applying a fixative at the end of your work helps protect the pastel from smudging and wear.
Use spray fixatives in a well-ventilated area and with light coats to prevent colors from bleeding. - Storage: Store your paints in protective folders or frames with glass to avoid direct contact with the surface.
Upright storage is ideal to prevent pastel dust from accumulating. - Material Maintenance: Keep your cakes organized and clean.
You can use a box with compartments and a soft cloth to wipe off dust residue.
Tips and Tricks for Beginners
-Practice Light Hand
Light pressure when applying the pastel allows for smoother layers and better blending possibilities.
Avoid pressing too hard, as this can saturate the paper and make correction difficult.
-Experiment with Textures
Don’t limit yourself to using only your fingers to blend.
Try different tools such as brushes, sponges, and blenders to see how they affect the texture and appearance of the cake.
-Use Color Strategically
Choose complementary colors to create contrast and analogous colors for smooth transitions.
Experiment with color combinations to discover new palettes.
-Learn from the Masters
Look at works by well-known artists who use pastel for inspiration and to learn new techniques.
Looking at how they handle light, color, and texture can offer valuable insights.
-Keep your work area clean.
Cake dust can be harmful if inhaled in large quantities.
Be sure to work in a well-ventilated area and regularly clean your workspace.
Pastel painting offers an exciting opportunity to explore color and texture in a direct and tactile way.
With these basic principles, you’ll be well on your way to mastering this technique and creating vibrant, dynamic works of art.
To learn how to work with pastels like a real professional, knowing all its characteristics, use of materials and how to get the most out of this technique, visit our Painting Course with Lifetime Access + Workshops.

¿Qué son los cuadros pintados con tiza pastel?
Los cuadros pintados con tiza pastel son obras de arte creadas utilizando barras o palos de pastel, un medio seco compuesto por pigmentos finamente molidos y un aglutinante débil. A diferencia de los pasteles al óleo, las tizas pasteles no requieren solventes para su aplicación, lo que las convierte en una opción popular para quienes buscan una técnica más limpia y rápida. Los pasteles de tiza se caracterizan por su capacidad para crear colores vibrantes y transiciones suaves, lo que ofrece a los artistas un control excepcional sobre la textura y el tono de la obra.
Historia de los cuadros en pastel tiza
El uso de tiza pastel en el arte se remonta al siglo XVI, cuando artistas como Leonardo da Vinci y Michelangelo comenzaron a experimentar con este medio para realizar bocetos. Sin embargo, no fue hasta el siglo XVIII cuando los cuadros en pastel tiza alcanzaron su apogeo, especialmente entre los retratistas franceses. Grandes maestros como Rosalba Carriera y Maurice Quentin de La Tour, conocidos por sus retratos delicadamente coloreados, contribuyeron a popularizar el uso de la tiza pastel como una forma artística seria.
Tipos de tiza pastel
Existen varios tipos de tiza pastel disponibles, cada uno con características únicas que influyen en el resultado final de los cuadros pintados con tiza pastel. Los tres tipos principales son:
- Pastel suave: El más común, se caracteriza por su textura suave y fácil mezcla, permitiendo transiciones graduales de color. Es ideal para artistas que buscan una textura aterciopelada en sus obras.
- Pastel duro: Tiene una mayor proporción de aglutinante, lo que lo hace más denso y menos polvoriento. Este tipo es perfecto para detalles finos y líneas precisas.
- Pastel al óleo: Aunque no es tiza en el sentido estricto, comparte algunas similitudes con el pastel seco. Es más cremoso y se puede mezclar como la pintura al óleo, pero no es adecuado para las mismas técnicas que los pasteles secos.
Técnicas para crear cuadros pintados con tiza pastel
Existen diversas técnicas para crear cuadros pintados con tiza pastel, dependiendo de los efectos que quieras lograr y del tipo de pastel que utilices. A continuación, exploraremos algunas de las técnicas más comunes.
Aplicación en capas
La aplicación en capas es una técnica clave en la creación de cuadros con tiza pastel. Dado que los pasteles son un medio opaco, puedes aplicar capas sucesivas de color para crear profundidad y matices. Al utilizar esta técnica, es fundamental trabajar de manera delicada, comenzando con capas ligeras y aumentando progresivamente la intensidad del color.
Difuminado y mezclado
El difuminado es una técnica popular para suavizar los bordes entre los colores y crear transiciones graduales. Para lograrlo, puedes utilizar tus dedos, un difumino o un paño suave. Esta técnica es especialmente útil en los cuadros pintados con tiza pastel cuando se busca un acabado suave, como en retratos o paisajes con cielos nublados.
Rayado o sgraffito
El rayado, también conocido como sgraffito, implica raspar capas de pastel para revelar las capas inferiores. Es una técnica muy eficaz para agregar textura a tus cuadros pintados con tiza pastel. Para hacerlo, simplemente utiliza un instrumento afilado como una aguja o un cuchillo y raya la superficie del pastel.

Materiales necesarios para cuadros pintados con tiza pastel
Para comenzar a crear tus propios cuadros pintados con tiza pastel, necesitarás algunos materiales básicos. Aunque los pasteles son el elemento principal, hay otros suministros que te ayudarán a lograr resultados óptimos.
Pasteles
Como mencionamos antes, los pasteles suaves son ideales para la mayoría de las técnicas debido a su facilidad de mezcla y aplicación. Si estás empezando, te recomendamos invertir en un set de calidad media-alta para asegurar la vividez y durabilidad de tus obras.
Papel para tiza pastel
El papel para pastel es fundamental, ya que su textura influye directamente en la adherencia de los pasteles. Busca papeles con una superficie rugosa o “granulada”, ya que permiten que las partículas de pastel se adhieran mejor. Algunas opciones populares incluyen los papeles Canson Mi-Teintes o papel de lija especial para pastel.
Fijador
El fijador es un spray que se aplica sobre los cuadros pintados con tiza pastel para proteger la obra y evitar que el pastel se desprenda. Sin embargo, hay que usarlo con moderación, ya que puede oscurecer los colores si se aplica en exceso.
Cómo preservar cuadros pintados con tiza pastel
Preservar un cuadro pintado con tiza pastel puede ser un desafío, ya que este medio tiende a ser frágil y susceptible a la erosión si no se maneja adecuadamente. Aquí te ofrecemos algunos consejos esenciales para proteger tu obra.
Uso de un vidrio protector
Enmarcar los cuadros pintados con tiza pastel bajo vidrio es una excelente manera de protegerlos de la suciedad y el polvo. Además, el vidrio debe colocarse a una distancia prudente del papel para evitar que las partículas de pastel se adhieran al vidrio.
Almacenamiento adecuado
Si no planeas enmarcar tus cuadros tiza pastel de inmediato, guárdalos en un lugar plano y cubiertos con papel libre de ácido. Asegúrate de no apilar varias obras juntas sin una protección adecuada entre ellas.
Para aprender a trabajar con pastel como un auténtico profesional, conociendo todas sus características, uso de materiales y cómo sacarle el máximo partido a esta técnica, visita nuestro Curso de Pintura con Acceso Vitalicio + Talleres.


